Filming the Wonderland Trail: Equipment
For complete background on this project, please reference the section on Filming the Wonderland. There you'll find a complete chronicle of every day that I was on the trail and the sections covered. Over the course of filming I spent 15 days (including filming the West Side road on bike), hiked 238 miles and amassed over 316,000 still photos and 19 hours of video from 3 cameras. However, I want to cover the equipment I used in this labor of love.
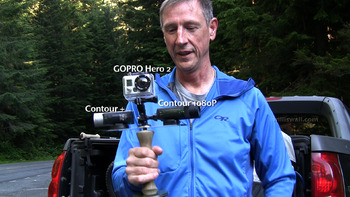 3 camera setup on custom mountCAMERAS
Panasonic GH2: for my first two outings I carried my GH2, along with a tripod, to specifically film the water sources and take photos of interesting features. However, I soon pared my system and equipment down to leave the bulky GH2 and the tripod at home as I found that the other 3 cameras could get the job done.
GOPRO Helmet Hero2: this was my primary camera, mounted facing forward. I took advantage of the cameras myriad time lapse functions and ended up using the 2 per second setting for recording the entire trail. Once stitched into video, the viewer will essentially see motion about 5 times faster than my hiking pace, or the equivalent of running about 8 miles per hour.
• PROS: despite having to return my first camera to REI due to faulty still photo recording (serious lapses resulting in having to redo a 10 mile section), this camera is extremely reliable. I used it in conjunction with the GOPRO battery backpack (with a total of 5 batteries), and found that I could use the backpack/camera combination for upwards of 5-6 hours before having to put in fresh batteries. This allowed me to film all day during the available reliable light, about 9 AM to 6 PM. I would usually fill an entire 32 GB card and be well into another 16 GB. Another great feature of this camera is the ability to access all functions on the trail. Lastly, records in 960 (Tall format) with 170 degree wide angle.
• CONS: I already mentioned the malfunctioning first camera, where I had serious holes in all my stills. Hopefully this was a rare situation. In general the color rendition of this camera is good; however, under certain lighting conditions the video has a severe yellow cast, which means I'll be spending a lot of time color correcting in post production. Also sub par, the audio. However, it was better than my Contours, especially as I used it with the open backed case allowing better audio recording than the waterproof case.
Contour Plus: Since this is the newer and "better" of my Contour cameras, I had this facing right; since I was recording the trail traveling clockwise, this camera would mostly be pointing toward the mountain.
•PROS: Good color rendition, in fact I generally think it is superior to the GOPRO. I will not have to spend much time color correcting video shot with this camera. Also, it takes excellent underwater video, crisp and clear with excellent color. Also records in Tall format (960) at 170 degrees viewing area.
•CONS: Finicky! I found myself swearing at this camera often when it wouldn't start, or would stop recording, or would freeze. Many times I had to reseat the battery to reset the camera. I bought the underwater housing, which is supposed to operate the record function magnetically. However, this feature was so unreliable that I had to manually put the camera in "record" mode, then place it in the underwater case, then put the case on the mount, then reverse the process to stop recording. Also, no matter how many times I set the date/time function on this camera, it defaults to December 2009 unless it gets a GPS signal....which isn't very often. Lastly, although there is an app that allows one to access functions via Android/iPhone, this was largely unreliable, so I stuck to the 2 function switch on the back with preprogramming. I would expect more out of a $500 camera.
Contour HD: An older version and my original helmet cam.
•PROS: Reliable, I turn it on and it actually turns on. Same for stop. Maintains date/time.
•CONS: Color rendition is flat and will require color correction on every clip. Two button function, so I have to set video modes in advance, no changing in the field. The Tall (960) camera coverage is limited to 135 degrees viewing angle. This early iteration of the Contours also has a serious flaw in processing the sun when it appears just out of the upper frame; it produces a purple streak, bisecting the frame, that is impossible to remove in post production. Luckily they seem to have corrected this in the before mentioned Contour Plus and newer cameras.
 ZPacks Zero and custom chest packBackpack: At first, when I was carrying both the GH2 and a tripod, I was using an older version of the Gossamer Gear Gorilla. However, once I pared down the system the remainder of the time I hit the trail with a ZPacks Zero (extra small) backpack and a custom made ZPacks chest pack, which I used to carry all the cameras, spare batteries, GPS and storage cards. You can read about this system in this prior blog. I kept the packs packed and simply changed out the food for each trip. I biked, hiked and ran with these packs and they remained comfortable. Consider that one of my days involved almost 16 hours encompassing 10 miles of biking and 26 miles of hiking/running. It's no wonder I am such an advocate of Joe and ZPacks.
 counter weights for stabilizationCamera stabilization system: After experimenting with gimbel based systems, I settled on something simpler: basic counterweighting. Using a Gossamer Gear 2 section Lightrek 4 pole, I constructed a platform for the 3 cameras out of aluminum and used the optional camera mount on the pole to secure the entire platform to the pole with additional washers and the GOPRO tripod mount. This allowed me to put the underwater mount on the bottom of the pole and add counterweights, extending the pole so as to get a good center of gravity. Although not perfect, most of the objectionable camera shake was eliminated for video and provided a solid platform for the time lapse stills to prevent blurring.
Whats in the pack? We experienced incredible weather this summer/fall, but I always carry gear for overnighting. Aside from extra clothing, including an OR jacket, Patagonia NanoPuff jacket, gloves, hat(s), socks and shirt, I always had my 10 oz. shelter system with me. Once I had to use the ZPacks Poncho as I trekked to my starting point early in the morning due to squall activity. I also carry 2 Petzl Tikka Plus lamps as I ended up night hiking a few times. Many times I had to hike twice as much or more of the actual film distance, so I carried along the matching GG Lightrek 4 pole: once finished with the filming, I would secure the cameras in the front pack, remove the counterweights from the other pole and use the poles for their intended purpose. Now I've blogged before on using minimalist footwear for hiking, but I used my old trail runners for this project. What with holding the camera pole in front of me, I just couldn't pay as much attention to the trail as minimalist footwear requires, and in fact tripped quite a few times on rocks and roots. I've done most of my training in Luna sandals, and indeed use barefoot techniques when I'm running on the trail, but I've found I just require the extra protection of a more substantial shoe on the trail.
This project involved not only time lapsing every foot of the Wonderland Trail, but I also video toured and mapped every backcountry campsite, logged and mapped every year round water source, repeated sections using the 3 camera setup to video every river crossing, many creek crossings and cool vistas, plus I recorded the entire West Side road using a chest mount and bike mount. In the process I fleshed out the equipment I've mentioned thoroughly. This fall and into 2013 I will attempt to compile my footage into products that will allow people to check out for themselves any part of the Wonderland Trail.
 Golden Lakes
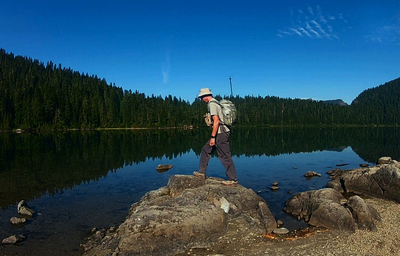
 getting water at St. Andrews Lake
 a crowd free Reflection Lakes in September
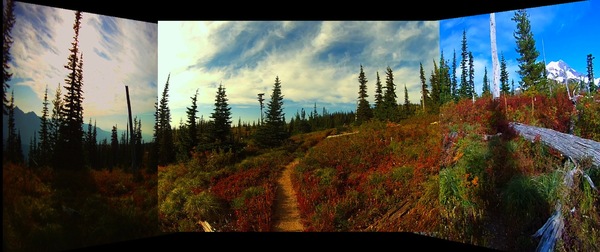 Silver Forest on the Wonderland Trail